NOT QUITE PAELLA

This is a dish which evolved from a family recipe I learned from my mother-in-law who got many of her recipes from my father-in-law's family. They were Italian but had a lot of Spanish influence from friends in their Tampa neighborhood. 

This is a great dish to serve for a crowd since you can prepare most of it in advance - if you omit the shrimp you can do the entire thing in advance! 

Because all of the meats are cut bite-sized you don't need a knife to eat it!

NOT QUITE PAELLA Ingredients: 

¼ cup olive oil 
½ pound boneless chicken cut into bite-sized pieces
½ pound sweet or hot Italian sausage cut into 1" pieces 
½ pound shrimp 1 medium green pepper cut into 1" squares 
1 medium red pepper cut into 1" squares 
1 medium onion, chopped
3 cloves garlic, chopped 
1 small can tomatoes, chopped - reserve juice 
¼ teaspoon saffron 
2 bay leaves 
salt and pepper to taste 
2 cups Uncle Ben's rice 
3 cups hot chicken stock 

1. Soak saffron threads in chicken stock. 
2. In a large sauté pan, heat oil, brown chicken, and sausage in separate batches, remove and set aside.
3. Cook onion, 2 cloves of garlic and peppers till soft.
4. Add saffron, tomatoes and juice, salt and pepper. Cook for 2 minutes. 
5. Add rice and stir thoroughly. Add hot chicken stock, chicken and sausage, stir well. Reduce heat and simmer for 20 minutes or until rice is almost cooked. 
6. Sauté shrimp with remaining clove of garlic till almost cooked then add to rice mixture for final few minutes of cooking. 

Dish may be prepared a day ahead up to step #6. Cover and refrigerate overnight. Reheat over low heat, sauté shrimp with garlic and add to rice mixture. 

You may vary the ingredients to suit your taste. For example: use chorizo instead of Italian sausage, add clams, mussels, lobster. Make it vegetarian by adding asparagus, artichoke hearts, carrots, peas, etc. and replace the chicken stock with vegetable stock or even water. You may also use Arborio or any other rice you may prefer.

Watch the video demonstration:


COMMENTS:  


Betty,

Made your "not quite paella" today and it was a big hit.
It was really quite good.
Easy to make.

We have enjoyed all of your recipes.

Brandy Snaps

I recently invited some friends for a "proper" Afternoon Tea.  I served the obligatory cucumber sandwiches and smoked salmon sandwiches along with shrimp salad rolls, scones with butter and raspberry jam, mini lemon meringue tarts, fresh fruit and Brandy Snaps.  I don't think any of the women there had tasted Brandy Snaps before and they were the hit of the afternoon.  I'm happy to share the recipe with you.

Brandy Snaps

Ingredients:

¼ cup light corn syrup
¼ cup molasses
½ cup butter
1 cup flour
⅔ cup granulated sugar
1 teaspoon ground ginger
2 teaspoons brandy


  1. Preheat oven to 300°.
  2. Heat the syrup and molasses to boiling. Remove from heat and add butter.
  3. Combine the flour, sugar and ginger. Add gradually, while stirring to molasses mixture. Mix well. Add brandy.
  4. Drop by half-teaspoonfuls three inches apart on a greased cookie sheet. Bake ten minutes or until large bubbles have subsided.
  5. Remove from oven, loosen one cookie at a time and roll over handle of a wooden spoon. Slip off carefully. Serve filled with whipped cream.

Variation:  Drop by rounded tablespoonfuls onto cookie sheets for cookie "baskets".
Use a large cookie sheet and make two at a time. Bake at 325° for 10 to 12 minutes. Remove from oven, allow to set for a moment or two and drape over inverted custard cups. Let sit until crisp.

Cautions:      Do not attempt to make these on a humid day!
Do not fill with cream until an hour or so before you are ready to serve - they will dissolve.

WATCH THE VIDEO DEMONSTRATION:

A Fresh Take on Fried Rice (A Quick Meal Suggestion)


I’m often asked if I cook at home every night… NO! We enjoy eating out at restaurants and at the homes of friends. When I have a really busy day or am just out of ideas, my go to meal is Chinese takeout!

Invariably, I have leftover rice and being of the “waste not, want not” school - I use that to make fried rice. You can pretty much use any leftover protein to go into it along with some onions, peas, eggs and scallions.

Here is my favorite combination:

Ingredients:

2 cups of cold leftover rice
2 eggs, beaten
½ an onion, roughly chopped
½ cup frozen peas, defrosted
½ cup chopped ham
1 cup chopped raw shrimp
2 or 3 scallions, roughly chopped
2 or 3 tablespoons vegetable oil
1 or 2 tablespoons soy sauce


1-Lightly oil a large skillet and pour in the beaten eggs. Swirl to make a thin “pancake”. Cook for a minute or two just until eggs are set. Turn out onto a cutting board and cut into shreds.

2-Add about a tablespoon of oil to the skillet, add the onions and cook for a few minutes until they start to soften. Push to one side and add the shrimp. Cook just until they turn pink. Remove the shrimp to a clean bowl and reserve.

3-Add the remaining oil to the skillet and add the rice. Stir to mix well with the onions.

4-Add the remaining ingredients and toss well until heated through.

5-Add soy sauce and toss to combine.

6-Serve and enjoy!
 
Watch the video demonstration:

Honey Dijon Chicken with Warm Potato Salad-how to prepare

A few weeks ago I was watching an episode of "Restaurant Impossible" while I was about to start dinner.  I had planned to make chicken breasts - with what else I don't remember!  Robert Irvine, the chef of the show, was teaching the restaurant cook how to make a dish composed of chicken breasts served over a warm potato salad.  I was amazed to see that he coated the chicken with egg beaten with honey mustard - this was exactly what I was going to do having discovered some time ago that the honey mustard adds great flavor to the chicken. 
The dish looked so delicious that I stopped what I was doing, went to the grocery store to pick up the ingredients I needed and made the recipe then and there.  I adapted it quite a bit from the original which involved a half gallon of oil to cook the chicken and three or four skillets.  I think this is a dish which you will enjoy too!
Note:  In my video demonstration, I used half the ingredients, but the recipe below will serve four.

Honey Dijon Chicken with Warm Potato Salad

Ingredients:

Dressing:
¼ cup white balsamic vinegar
2 tablespoons bacon fat, at room temperature (from diced bacon)
1 tablespoon Dijon mustard
½ cup olive oil
Salt and pepper

Chicken:
Oil for frying
¼ cup honey mustard
2 eggs, whipped
Four 6-ounce chicken breasts
1 tablespoon salt
1 teaspoon pepper
½ cup all-purpose flour
1 cup Japanese breadcrumbs

Salad:
1 tablespoon olive oil
¼ cup thinly sliced shallots
4 ounces  haricot verts, steamed
5 or 6 small red potatoes (about 8 ounces), poached or steamed, medium doneness
¼ cup cooked and diced bacon
¼ cup hot chicken stock


Directions:

In a medium-sized skillet, cook the diced bacon until browned and crisp.  Remove to paper towels to drain and reserve 2 tablespoons of the rendered fat.  Wipe out the pan with paper towels.
In a food processor, mix the vinegar, bacon fat and mustard. Mix well, and then slowly drizzle in the oil until well emulsified. Taste and season. Note:  if you don't have a processor, simply whisk the ingredients together.
In a dish, blend the honey mustard and eggs. Next, sprinkle the breasts with the salt and pepper. Then toss in the flour, then the egg wash and finally coat each breast well with the breadcrumbs. Repeat the process with each breast. Preheat the oil in the skillet until shimmering. Fry for 3 minutes. Flip and finish for a final 3 minutes. Once the chicken is cooked, remove from the oil and allow any excess oil to drain on paper towels. Wipe out the skillet again.
Warm the olive oil in the skillet over medium heat, warm the oil and then add the shallots, haricot verts and potatoes. Cook, stirring occasionally, for 3 to 4 minutes. Then reduce the heat and keep warm for dressing.
Add hot chicken stock to dressing and whiz until emulsified.  Add to the potato mixture and stir to coat. 
Place one quarter of the potato mixture on each of four plates, sprinkle with bacon and top with a chicken breast.

WATCH THE VIDEO


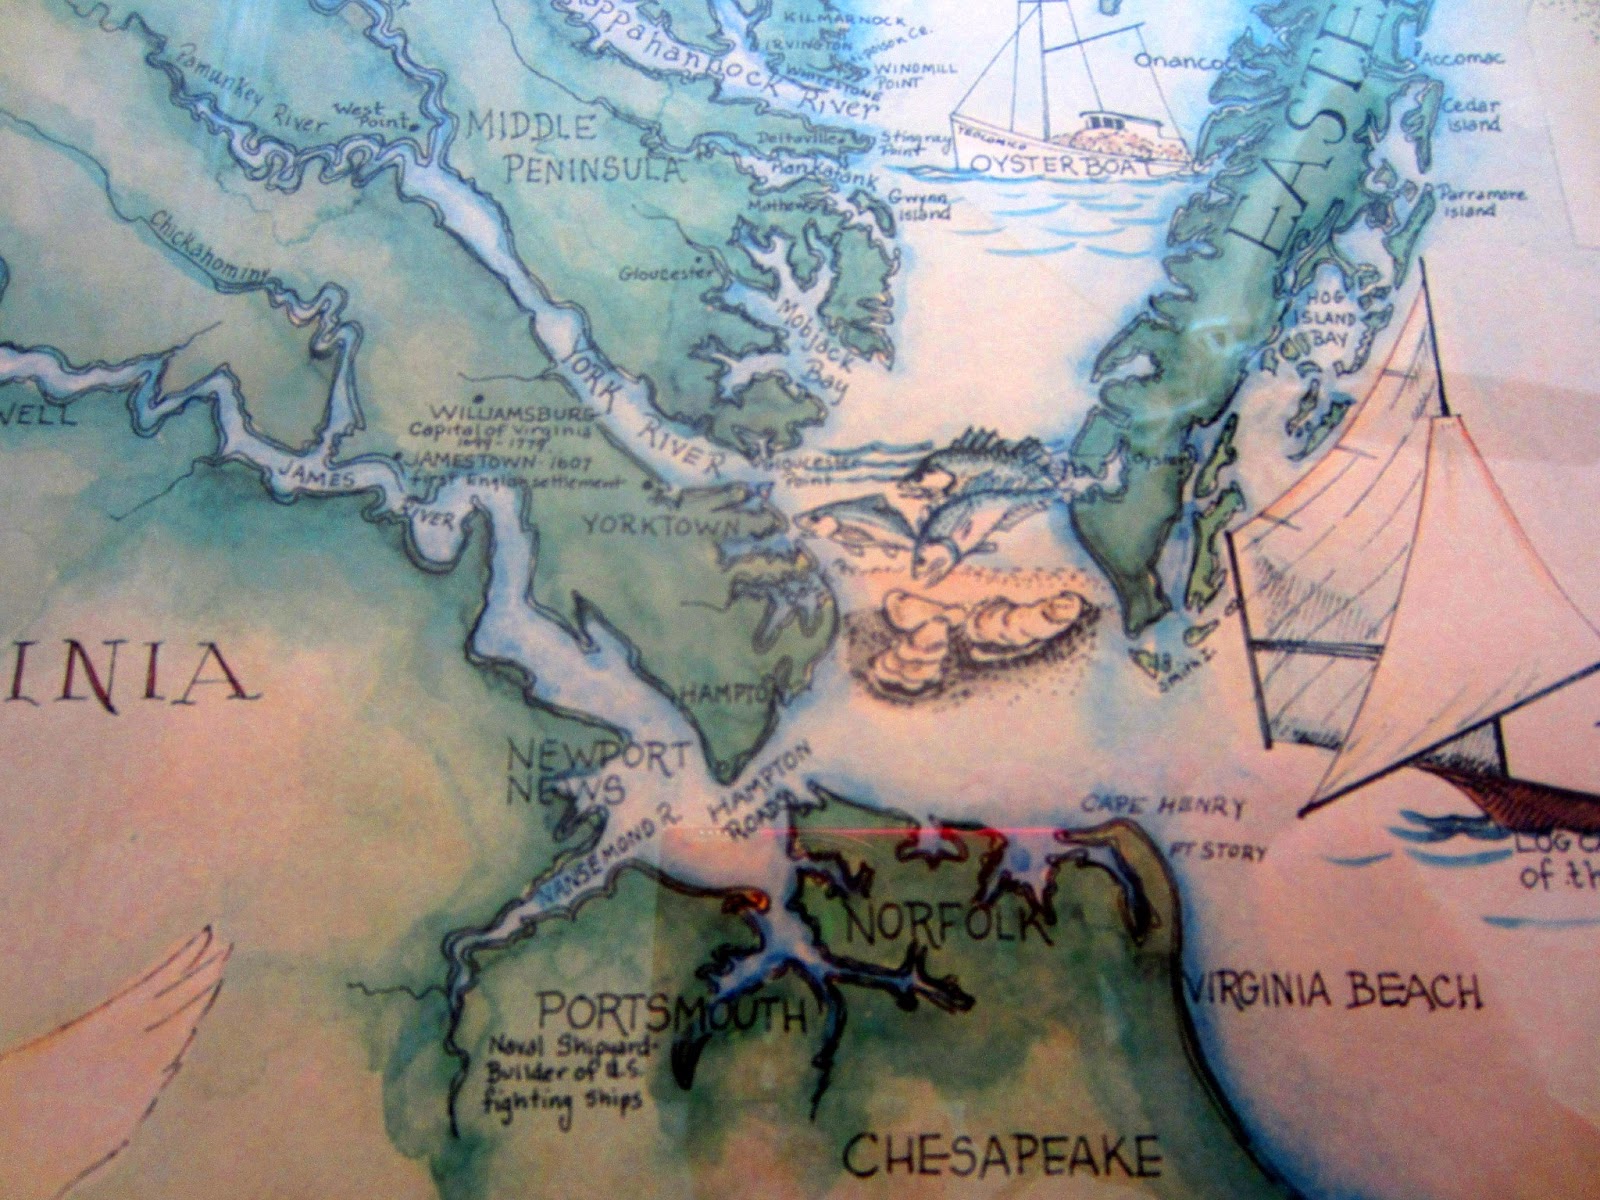
CHESAPEAKE BAY CRAB CAKES

When we lived in Virginia Beach on an inlet from the Chesapeake Bay, we could - and did - catch blue crabs right off our dock. While they made great eating just boiled with Old Bay seasoning, they were even better made into crab cakes. I mean real crab cakes with lots of lump crab meat and very little else. Here's my recipe:


1lb. backfin crabmeat
4 tablespoons fine, dry breadcrumbs
2 tablespoons finely chopped parsley
I cup mayonnaise
I teaspoon Worcestershire Sauce
4 tablespoons red pepper, finely chopped and sautéed in 1
tablespoon butter until softened
1 tablespoon lemon juice
6 drops Tabasco, or to taste
1 ½ teaspoons Old Bay seasoning
1 to 1½ cups Panko bread crumbs
Oil for frying


In a medium sized bowl, combine the breadcrumbs, parsley, mayonnaise, Worcestershire sauce, red pepper, lemon juice, Tabasco and Old Bay and then fold the crabmeat in gently.
Dip in Panko
.
Form into 6 cakes and fry for about 5 minutes on each side or until nicely browned. You may also make these an hors d'ouevre by using just 2 tablespoons of the mixture per cake.

(Leftovers reheat beautifully and they can be frozen)


Rick and I in our front Williamsburg style garden


Our dock where we caught crabs with a chicken baited line

Watch the video demonstration:

Immersion blender injuries!


Yesterday's New York Times contains an article that absolutely stunned me - an account of people injuring themselves while using an immersion blender.
I have been using one of these marvelous gadgets for years without sustaining so much as a scratch so I was amazed to read of people requiring huge numbers of stitches and worse. How could this possibly happen? 

Well, it seems some people attempt to clean or remove something which has clogged the blender without unplugging it. A) I have never had anything clog my blender and B) if I did, I would have great respect for a tool which can purée a cauldron full of soup in the blink of an eye. 

The end of the article quotes a former pastry chef who voiced my opinion -some people are just stupid!

Read the full article at http://www.nytimes.com/2013/01/16/dining/immersion-blenders-can-be-a-danger-in-disguise.html?src=dayp

Scottish shortbread recipe challenge

I recently acquired a copy of Thomas Keller's Bouchon Bakery - a magnificent tome worthy of any cocktail table!  

My mouth was watering as I flipped through it - mentally making notes of recipes I can't wait to try. 

Then I came upon his recipe for shortbread.  He stops short of calling it Scottish, but does refer to it as traditional.  While I would never have the temerity to match my skills to his, I do take great exception to the inclusion of vanilla - in any form - in shortbread.  

I have tasted this  wonderful treat many times in many homes in Scotland and none of them contained vanilla.  To my taste, this ruins the sublime flavor of butter, sugar and flour.  My own recipe, which you can find in this blog, contains butter, sugar, plain flour and rice flour.  The only other variations I have encountered replace the rice flour with cornstarch or very fine semolina.

Shortbread aside, this is a book any home baker will love - some of the recipes are more for drooling over than actually baking and some of the equipment is a bit esoteric to say the least. Nevertheless, it is a fabulous book well worth owning.


Here are two of my shortbread videos;


Cookbooks we like

If Santa didn’t grant all your wishes this Christmas, here are a few cookbooks you might want to consider:


The Smitten Kitchen by Deb Perlman. From the famous food blogger, a chatty (maybe too chatty?) book with well thought-out recipes. I bought this one for my vegetarian son-in-law because of the interesting-sounding veggie recipes. There were quite a few recipes that the carnivores in the household would enjoy also.


Barefoot Contessa Foolproof by Ina Garten. The Food Channel’s greatest asset has come out with another winner. Great recipes for entertaining or just preparing a special meal for family. Ina’s great style gives clear instructions for preparing foods that are widely available. I love the many lobster recipes since lobster seems to go on sale at my market regularly. Can’t wait to try the lobster corn fritters!


Canal House Cooks Every Day by Melissa Hamilton and Christopher Hirsheimer. You may be familiar with the smaller books they issue 3 times a year but this is a heftier volume filled with fabulous seasonal recipes. Nothing pretentious here just beautiful food beautifully prepared. This was another gift for by son-in-law. Again, not a vegetarian book, but one with lots of recipes he can enjoy.


Click on "Betty's Kitchen Fare Store" below right to shop at our
Amazon outlet for these books and more.

Chocolate Tarts (Part of Christmas Cookie Series)

Whenever I threaten to cut back on the number of Christmas Cookies I bake each year, I can count on several family members saying "Not the Chocolate Tarts!". These are a labor-intensive cookie but well worth the effort. I shared this recipe with a friend many years ago and she used to say she wasn't sure whether to thank me or not since her children loved them too and demanded they appear on the table every Christmas. Give them a try and let me know whether or not you think they are worth the effort!

Chocolate Tarts

Ingredients:

½ cup butter at room temperature
1 cup sugar
1 egg, at room temperature
2 ounces unsweetened chocolate, melted and slightly cooled
½ teaspoon vanilla extract
¼ teaspoon salt
¼ teaspoon red food coloring
2 cups flour
Fudge Filling - recipe follows

In the bowl of an electric mixer, beat butter at moderately high speed. Gradually add sugar, beating until well blended. add egg and continue to beat until mixture is light and fluffy. Add chocolate, vanilla, salt and food coloring. Beat to blend. Reduce speed to low and gradually add the flour, scraping sides of bowl often.

Remove from bowl, shape into disk, wrap in waxed paper and chill for 30 minutes.
Meanwhile, using 2 tablespoons melted shortening and pastry brush, thoroughly grease 6 dozen tiny tart pans.

To line each mold, take a rounded teaspoonful of the dough and shape it into a ball, fill all molds. With your fingers, press the ball of dough onto the bottom and sides of the mold in a thin layer. Place molds on cookie sheets and bake at 350° for 15 minutes.

With a paring knife, gently loosen cookie cups from molds. Place on wire racks to cool completely. Fill each about ¾ full with Fudge Filling. Let stand at room temperature until filling is set.

Fudge Filling

1½ cups sugar
⅓ cup milk
¼ cup butter
1½ ounces unsweetened chocolate
3 tablespoons light corn syrup
⅛ teaspoon salt

Combine all ingredients in a heavy saucepan. Place over moderate heat and stir until chocolate and butter are melted; bring to a boil. Remove pan from heat.
Stir vigorously until mixture is slightly thickened but still pours. Keep warm over hot water or very low heat. Spoon into Chocolate Tarts.

WATCH THE VIDEO DEMONSTRATION:


COMMENTS:

Oh Betty, these chocolate tarts look divine! They may be labor intensive, but you can tell that they will be definitely worth the effort. One question, why do you use that small amount of red food color in the dough? My next quest will be to locate some mini tart pans! Thanks for another great recipe and instructions! Auntnancy77 (Youtube)

Hi Nancy,

The red food coloring helps to make a contrast between the cookie dough and the filling. You may eliminate it but I think it makes for a better looking tart.

I have been searching for the tart pans for ages. Mine are well over 40 years old and I bought them from Maid of Scandinavia - a company long since gone. The nearest I have seen are from New York Cake Supply but they are over 2 inches in diameter - the ones I use are just over an inch. If you are successful in finding them, please let me know. Happy Holidays!


Rugelach (Part of Christmas cookie series)

Betty's Annual Christmas Cookies

The first recipe I had for these wonderful cookies was called simply “Apricot Pastries”. It was a number of years later that I discovered they were actually Rugelach. By then, they were firmly ensconced in my Christmas cookie repertoire. In addition to the original apricot filling, I have added a raspberry, chocolate, coconut filling. I have to warn you - these are very addictive!

Apricot Pastries

Ingredients:

1 cup butter
2 cups flour
1 beaten egg yolk
½ cup sour cream
½ cup apricot preserves
½ cup flaked coconut
¼ cup finely chopped pecans
granulated sugar

With pastry blender, cut butter into flour until crumbly.
Combine egg yolk and sour cream and blend into flour mixture.
Wrap dough in wax paper and chill several hours or overnight.
Divide into 4 equal parts. Roll into 10" circle keeping remaining dough chilled.

Sprinkle with 2 tablespoons apricot preserves, 2 tablespoons coconut, 1 tablespoon pecans. Don't use too much jam - it will only leak out and make a mess!
Divide into twelve sections (like a pie). Roll up each section starting with wide end and dip in sugar.
Bake at 350° for 20 minutes.

Makes 4 dozen

Alternate filling:

4 tablespoons seedless raspberry jam
¼ cup finely flaked coconut
¼ cup miniature semisweet chocolate pieces
½ cup finely chopped walnuts
¼ cup sugar
3 tablespoons cinnamon sugar (optional)

Proceed as with Apricot Pastries

Makes 4 dozen

WATCH THE VIDEO DEMONSTRATION